The bottom curves around hiding the end of a piece of vinyl siding.
Bottom j channel siding.
1 4 inch weep holes should be drilled about 12 inches apart into the j channel only.
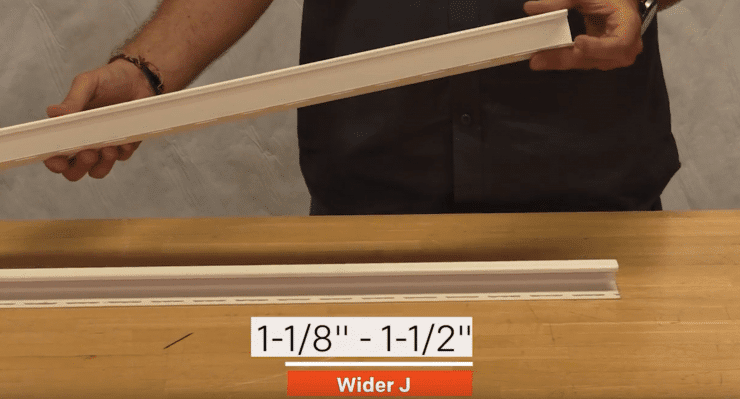
Spend the extra few bucks on the wider stuff and start your siding a bit lower.
The nails for the first course will be accessible now.
This will help keep the track dry and prevent accumulation of unwanted moisture.
For pricing and availability.
Most suppliers sell two sizes of starter 2 1 2 in.
Georgia pacific j channel 0 625 in x 150 in vinyl siding trim.
Compare 15 more.
It protects the sheathing from rain snow and pests.
For pricing and availability.
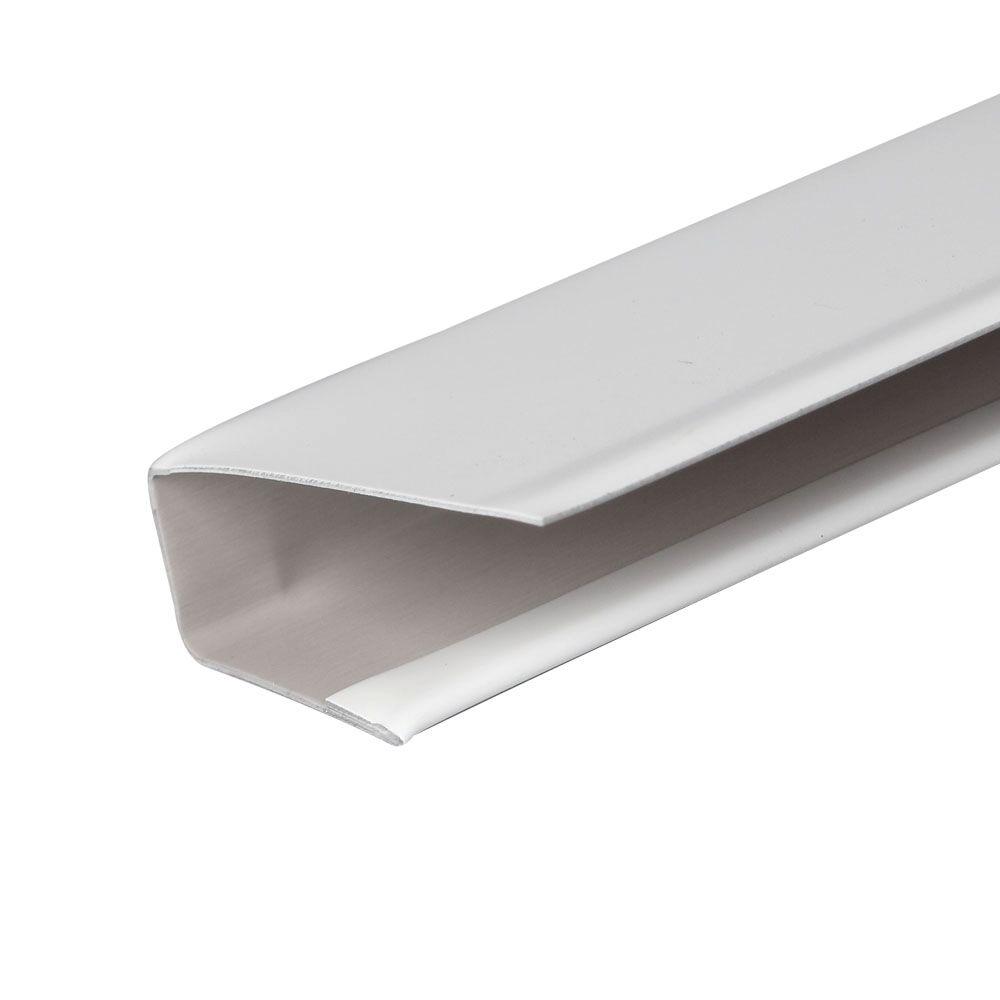
The j channel is the groove in vinyl siding that locks the individual pieces together.
Beginning at the bottom of the foundation siding is installed by hooking a j channel onto a protruding.
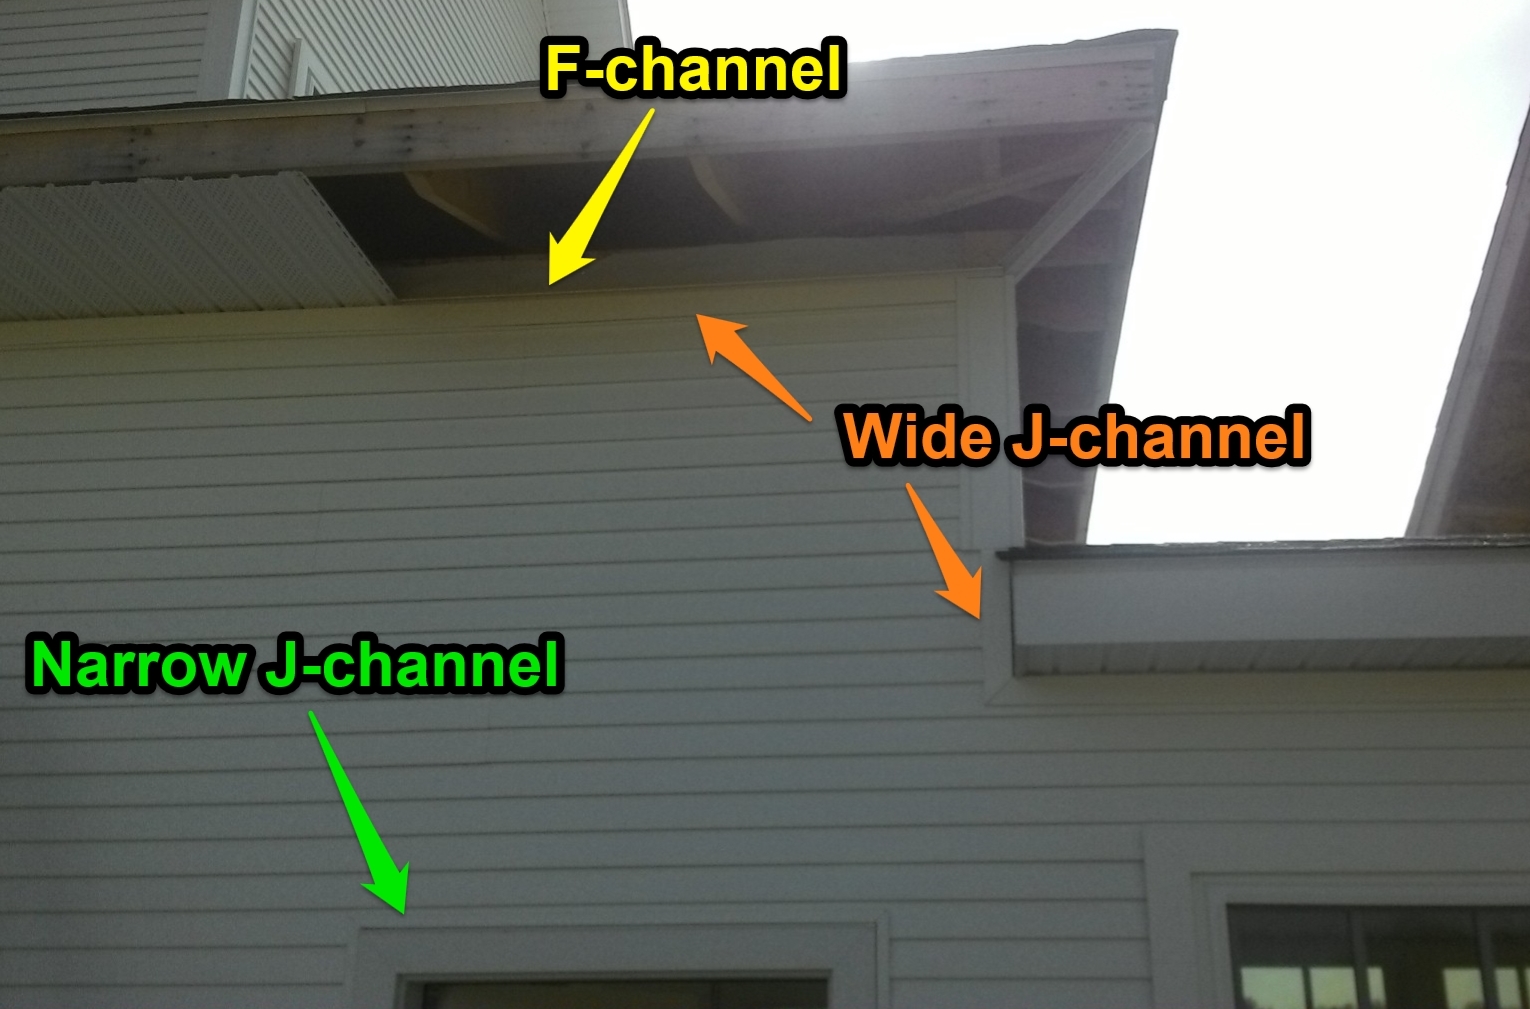
J channels typically are used to hide the ends of siding as it butts up against windows doors or similar objects.
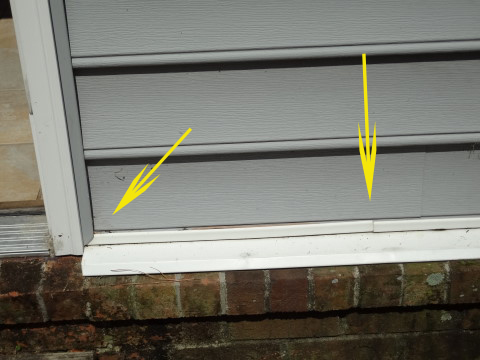
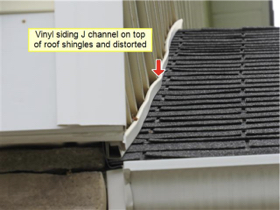
When vinyl j channel is used at the bottom like this proper flashing is essential especially at the corners.
See the accessories section for tips on snapping a chalkline install j channel along the chalkline as a receiver for the vertical siding.
Remove the nails and the piece of siding.
Typically the chalkline is positioned so that the bottom of the j channel that will be installed like a starter strip is 1 4 6 4mm below the lowest point on the wall that will be sided.
You will need to remove the bottom course of siding with your removal tool.
Locate the area where you want to remove the j channel.
The top of this trim has small holes that allow it to be attached to a substrate without drilling into the vinyl.
Below the top of the foundation but the lower the vinyl siding is installed the better.
You will actually start by pulling the bottom of the second course out of the top of the first course.
Install the rest of the siding as you normally would cutting around the windows and doors and fitting the last piece of siding into the j channels.
The bottom of the starter strip the part the bottom panel hooks on to should be at least 1 in.
Step 2 hook a zip tool into the locking or butt edge of the piece of siding above where the j channel is you are removing.
Figure out which pieces of siding you will need to remove to get to the j channel you are removing.